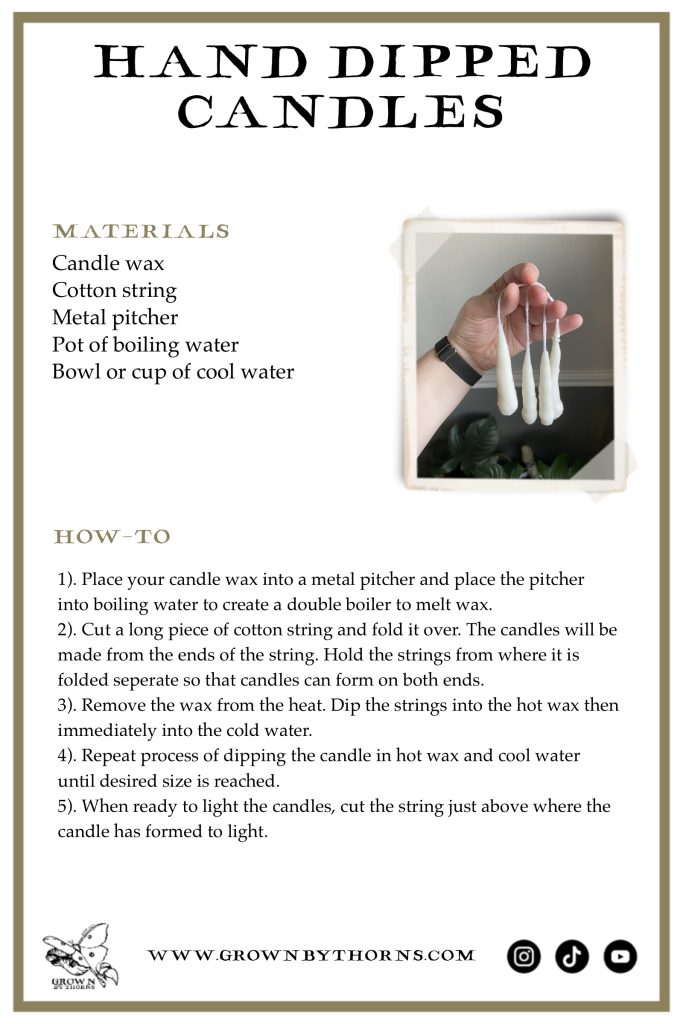
 Hand Dipped Candles DIY
Instead of selecting resolutions for the near year, I decided to make a list of 100 things I wanted to try doing in 2025. I created a spreadsheet to track all the activities, the dates I complete the projects, and any notes I may have on them. I’m challenging myself this year to not only complete the list of 100 things but document my experiences doing them.
This brings me to my first project of the year, #62 on my to try list, making hand dipped candles. I wanted to start out with something that seemed relatively simple and straight forward so that the first project could ease me into my personal challenge. I like the idea of making candles because not only do I use them regularly but they make great gifts. For a lot of the projects that I have on my ‘to try’ list I plan to share them with friends and candles are something that I can easily give to others.
To start this project I ordered a candle making tool kit off of amazon. This kit came with soy wax, a metal pitcher to melt the wax in, a long stir spoon, candle wicks, a silicone coaster, thermometer, and a toll to center candle wicks. This kit had multiple tools that I would need to complete other activities on my to try list that I felt it was easier to just by the kit instead of searching out individual items, however it is not all needed for this project. To make basic hand dipped candles you only need the wax of your choice, cotton string, a glass of cold water, and the metal pitcher.
The Process

Dipping the wax covered strings into cold water with a piece of card board to separate the strings.
To melt the soy wax I placed it into the metal pitcher then placed the metal pitcher into a pot of boiling water to create a double boiler. Once the water was to a rolling boil the wax melted very quickly and I only needed to stir it a few times.
I then took my cotton string and cut one long piece folding it half. Holding the string from where it was folded, I used a small piece of cardboard to separate the string so that the ends had space to make their own candles. I also made a candle hanging stand out of a cardboard box to hang finished candles on as they fully cooled.
To prepare to dip the candles I set out one glass of ice water and took the candle wax off the heat. I then dipped the ends of the string into the hot wax then placed it in the cold water immediately. I repeated this process repeatedly until I got to the candle size I wanted. To make the candles the size I wanted took less than 5 minutes. Sometimes I had to smooth out pieces as I went to make sure that they didn’t warp and created straight candles.
To smooth any larger issues it helped to put the candles in the warm water that was cooling from my double boiler to warm the candle enough to make it malleable without remelting it. When I finished my candles I placed them in my warm water for a minute then took them out and pressed the ends against a flat surface to give them a flat base to stand from.
At this point the candles were finished. I left some together for decoration but cut the cotton string on one set to test light my candle.
Final Thoughts
 It was quick to light and held it’s flame. The flame was a bit small but I think that was from cutting the string a bit too close to the candle. For my first project of the year and activity off my to try list I was pretty pleased with how it turned out. I think in the future I will want to try using beeswax instead.
Instead of using my fireplace as intended, I have it full of candles and I light them fairly often so I know these candles will actually be used in my home. In the future I may even try this project again reusing some of the wax that has accumulated in my fireplace tray. In the future I think I’d also like to try coloring the wax and scenting the candles I make.
If I were to rate this project I’d probably consider it an 8/10, it was fairly cheap and very easy to set-up but kind of messy. While most of my candles turned out okay, some got very lumpy and sad looking but they were still fully usable.
TL;DR
Here is a review of the process I used to make the candles
This post contains affiliate links to my Amazon Storefront. As an Amazon Associate I earn from qualifying purchases at no cost to you. For full details on what that means please visit my disclosures and privacy policy page.